Saturday, November 16, 2013

Smash Book Meets Artbooking Mini Albums: The Mini Series!


 Part 2:  Ribbon & Buttons

In my October 31st Post, I started this sort of Mini Album.  Those pages are going to end up being pages 10 & 11.  You can click on the date to see those pages.  Part 2 is showcasing pages 6 & 7 with an envelope tucked between them.  So, with no further intro here they are!

Page 6 is a cut from the CTMH Artbooking cartridge.  It is very lightly embellished with a border from the CTMH Florentine Paper.  
The envelope is cut from CTMH Champagne cardstock.  I used the Cuttlebug Paisley folder to emboss the flap and inked the edges with Chocolate CTMH ink.  The paper is again from the Florentine.  (I wish I had purchased more of that pack!  The papers really have a lacy, feminine country style about them.)  I used two buttons fromCTMH Mini-Medley Accents antiqued gold and blue embroidery floss as a closure.  

 The flip side of the envelope is cut from Florentine papers and I think I snuck a piece of Clementine in there - both retired from CTMH.  The button was in my stash, but I think it came with the scroll kit from CTMH.  The flower cuts are from the CTMH Art Philosophy cartridge.

Page 7 was cut from the Artbooking cartridge.  In CCR I made the page wider.  Then I folded it over the tope of page 7 on the hinged side.  I cut a piece of patterned paper and taped it down to the page.  To decorate the flap, I stamped a sentiment from the CTMH Love Life stamp set with Cocoa pigment ink onto more of the Florentine paper.  I taped this onto the flap.  Next, the ribbon was adhered to the flap folding the edges under the flap.  Finally, using an ATG gun, I taped down only the top and bottom flap edges creating a vertical sort of pocket for holding papers, tickets, or other goodies.  I tied a double bow to embellish the top of the ribbon and set the sentiment off with a gem from the CTMH Brown & Tan Sparkles Assortment.   

This week at Fantabulous Cricut Challenge Blog the challenge is Ribbons and Buttons.  I'm submitting late in the week and have seen the submissions; there are some very fun and creative cards, tags, and pages over there!

Check out KatiesCorner for all the incredible CTMH products and inspiration!  There are videos, tutorials, and ideas to spark your creativity!

Friday, November 15, 2013

Seeing Double White

Well the snow has already been flying in the midwest, so I guess it's time to winterize the horse trailer and think about winter activities!

The challenge over at Bitten by the Bug 2 is White on White and Heart 2 Heart is Seeing Double.  The winter weather and these challenges inspired me to think of ice skates -- white and there are two!

I started with CTMH Slate cardstock for the base.  I used a flurry type cuttlebug folder on CTMH Daisy White cardstock.  The skates are also cut from Daisy White; they were cut from the Winter Woodland cartridge.  I wanted to lace the skates with embroidery floss and silver thread; so, I cut off the laces on the cut.

They are hanging from a CTMH opaque silver gem.  I trimmed out the card with some white satin ribbon from the bag and a CTMH Floral Accent.

I am loving all the new accents from CTMH!  Check them out at KatiesCorner!

Tuesday, November 5, 2013

Life was Simpler in Black & White


When I saw the Black, White, and any shade of Green Challenge over at Color My Heart, I couldn't help but think of the old black and white TV's and the old sitcoms from my childhood.  I Love Lucy and The Dick VanDyke Show were a couple of my favorites.  Of course, I saw them years later in reruns as I'm sure most of you ladies did, also!

I remember the beautiful dresses and fashionable accessories the women would wear and all the polka dots.....and of course, PEARLS!  

Now, you might be thinking, "Sure, I remember, but where does the green come into play?"  Ah, I'm glad you asked! I remember when we would turn on or off the television, there would be this warm green glow.  I'm not sure if there truly was, or if I just remember it that way.

I suppose I'm feeling a bit nostalgic seeing as how I received my first AARP letter in the mail a couple of weeks ago!  Yee gads, couldn't they at least let me get through my birthday month?

I have digressed, as I often do, *sigh*....... back to the card!  The base was cut welding together Squares 1 and 2 from the CTMH Art Philosophy Cartridge.  My silhouette was cut from Sentimentals Cartridge.  I adhered the top layer to the middle layer and popped that off the first layer with 3-D tape.  I cut it lengthwise to accommodate the table and chair legs.  The pearls are CTMH Opaques Licorice and Pearl Adhesive gems; the paper is CTMH Daisy White, Black and Sweet Leaf.  I tied a double bow with ribbon from the 'bag o' ribbon'-- I really need to organize that someday.

Out to the barn now and then maybe I'll catch up in Mayberry over lunch with Andy, Opie and Aunt Bee!


Thursday, October 31, 2013

Smash Book Meets Artbooking Mini Albums: The Mini Series!

 Part 1:  Counting the Layers!


I'm starting my Christmas gifts with a sort of ........ well, it's not really a mini album and I wouldn't call it a scrapbook -- wouldn't necessarily say it's a smash book.....  Hmmmmm, maybe I'll create a name for it as the mini-series continues!

The challenge over at Heart 2 Heart this week is a multi-layer
work.  This inspired the page on the left.  I've included 2 pages in this post; but I'll be concentrating on the multi-layer page.

All of this incredible cardstock and paper is from CTMH ~ with one exception.

I'll start with a brief description of the page on the right.  I started with Champagne Cardstock and paper from the Florentine collection.  (I've been saving this for the right project!)  The large tag is Tag 3 from the Art Philosophy Cartridge.  I went into CCR and "hid" the holes, cut the tag and then cut off the bottom and sliced it in half.  The stamps are from CTMH Country Born and A Flowering Bunch.  (Sidenote about Flowering Bunch:  I didn't like this one when I bought it and now it's one of my favs!  Funny how that happens!)  Distressing was done with Barn Red and Chocolate inks.  I only taped down the left side under the ribbon area.  That way my friend can lift this tag and put something under there!  I then embellished with a scrap of brown grosgrain ribbon, Mocha Gems, and the little gem over the ribbon is from Mini-Medley Accents Rosewood.


Ok, on to the layers upon layers page!  I started with a piece of  cardstock *layer 1 and adhered my blue patterned paper *layer 2.  Then I put the border on the right side.  The ribbon creates *layer 3.  I then cut two envelopes from the dark brown cardstock (I think it might be Chocolate) using the Artbooking cartridge.  Since the envelopes fold we now have *layers 4 & 5!  Cuttlebug bird and vines folder added embossing to the 5th layer.  I then turned to my Art Philosophy cartridge and cut 4 tags; 2 from Champagne and 2 from the Florentine paper.  I stamped the Champagne tags with the notebook lines for journaling.  Let's see, this creates 2 more layers; now we're up to *layers 6 & 7!

I put twine around the envelopes before sticking them onto the page and tied the lace doilies from the Mini-Medley Antiqued Gold onto the twine.  There's *layer 8.  The You are my Happy is from the CTMH Stamp Set with the same name - another *layer 8.  NOTE:  This tag is not from CTMH paper; I found it laying on the desk and thought it was a great size!  It was left over from Katie's wedding; you'll be seeing lots of wedding leftovers in my projects!

I took this entire page and adhered it to another piece of cardstock (could this be *layer 9?) you will see next week in the mini-series.  When I adhered it, I used an ATG and did a U or C shape leaving the left side open to slide in the mat for pictures and journaling.

I then cut the Art Philosophy shape 8 *layer 10 from Champagne cardstock and inked it in Chocolate.  I cut mats for both sides, corner rounded them, and inked them in Sweet Leaf and Twilight. I placed a journaling card on one of the mats *layers 11, 12, & 13!  The Chocolate stamping on that journaling card is from the Sweet and Lovely set.  I, of course, had to pop a Mocha Gem there for the pull.  I love those Mocha Gems!

I imagine you feel you've been in on an episode of Sesame Street counting to the number 13 on Halloween!  I can just see 'The Count' going through the layers of this!

*If you are obsessed with counting, I didn't count the twine as a layer. I included it with the doilies. I had to end on 13 since it's Halloween!

Wednesday, October 30, 2013

And the Witch Leads the Way!


tRicK oR tReAT!

This big sister is leading the way with her little siblings hurrying to keep up!  A Child's Year was the perfect place to find cuts to weld together for this scenario!

The cardstock is all CTMH with the Orange from the DreamPop.  The green cardstock was stamped using the frosting portion of the cupcake in the Art Philosophy Bundle stamp.  I also colored the ribbon with CTMH Pansy Purple -- I think they call it Gypsy now!  The green ink is Citrus Leaf.

Alphabet - CTMH You are MY Happy!  I love that set!  Rhinestones were in my caddy - not sure of brand.

I just had to put two cards in BBTB2 this time because Halloween is too much fun for just one card!

Have a day filled with sweet treats and fun!

Monday, October 28, 2013

Renaissance Witch on her Journey, Oh My!


This Dreamy Halloween Lady
is cut from the A Child's Year Cartridge.  I was looking for a bit more Renaissance and less spooky feel for this card.  To achieve that effect, I altered the "witch" by removing the broom and making her hat more of a Renaissance type than a witch type.  (I love welding and  altering shapes from the cartridges!)  She is cut from CTMH black cardstock.

All other cardstock and paper is from the Dream Pop package. The orange patterned strip was inked around the edges with Bubblegum Pink.

I have lots of tulle left over from Katie's recent wedding; so I colored some of it, along with some white satin ribbon, with my orange stamp pad.  I used the orange tulle to embellish with some pink and orange embroidery floss.  The little pink gems are from CTMH.  The pink ribbon with the white swirl pattern was in my 'bag-o-ribbons';  I'm not sure where I got it.

When the card was finished, it had a different look than I had at first envisioned.  But then again, most of my creations do.  I seem to take twists and turns as I'm going along.  I guess it's because many times life is about the journey and not the end result.  Since art imitates life, and vise versa, I guess that makes sense!

I'm excited to give this to my favorite little lady on her big Trick or Treat Night when I'm sure she'll have an adventurous journey, but first it's going off to Bitten by the Bug 2 for the Trick or Treat Halloween Challenge!

Check out KatiesCorner and treat yourself to some new CTMH goodies!  Some great deals at CTMH now!

Wednesday, October 23, 2013

It's in the Pumpkin Bag this time!


In my Sept 23rd post, I did an "It's in the Bag" for my gift bag.  Well, I gave it away before Mom's birthday!  Yikes, so I needed another bag for her special day at the end of October!

When I saw the challenge this week from Bitten by the Bug 2, I thought this time it could be in the Pumpkin Bag!  I had some pumpkin cuts leftover from the project I did in my October 20th post and wanted to use them before they got lost in the abyss of paper in my craft room!

The bag is cut from the Cricut Art Philosophy cartridge from CTMH.  I used DCWV cardstock for that ~~I think it was DCWV.  (It is an older paper pack and the cover was torn off.  I think I used the cover for another project!)  The green vines caught my eye; I thought they resembled pumpkin vines!

The pumpkins were cut from the Cricut Artbooking cartridge from CTMH.  The cardstock is from the Dream Pop Paper Pack.  I embossed it with a M-Bossabilities folder.  The bow was made from Berwick Wired Edge Pumpkin Spice Craft Ribbon.

I made the little gift tag from the same cardstock as the bag.  I used Champagne and Olive cardstock from CTMH.  I inked the edges in Topiary ink.

Quick, easy bag made with leftovers and scraps!  Gotta' love that!

CTMH products from KatiesCorner.

Tuesday, October 22, 2013

Romantic Christmas Lace

Now, as many of you
might suspect, a girl who hangs in the barn most of the day isn't really into lace.  One would think lace is a very country sort of thing, but I was stumped.  However, I was inspired seeing the beautiful projects by the Design Team and the other submissions at Heart 2 Heart today!

This box is cut from the CTMH Artiste Cartridge.  I used the pretty CTMH Frosted paper which definitely has a lacy feel to it.  I inked around the heart cut out with Slate pigment ink.  The top has a little decorative element of Sky Blue with a strip off the end of the Frosted Paper.  The pearl is from the Mocha Gems.  I used the CTMH Color-Ready Seam Binding in its natural color for the ribbon.


The lace on the front was from the Artbooking Sweet and Lovely stamp set.  I used CTMH White Daisy pigment ink and stamped on acetate.  I then sprinkled a little glitter onto that.  I used the 3-D Foam Tape to pop off the sentiment from CTMH Very Merry Christmas.  The sentiment was inked with Twilight ink.  I popped off the lace with more 3-D foam tape.

Visit KatiesCorner for any of the products used in the project!

Monday, October 21, 2013

Spooky Spiders! Yikes!


I know it's fall in the barn when I see all the webs and -- yikes -- spiders.  I must admit, NOT my favorite thing to see while I'm out there!  But.....these little guys aren't too scary!  The bigger spider is hanging from his web on a *translucent illusion cord.  He can swing down from his web to crawl around the gears!  Eeks!

The card cut is from CTMH Art Philosophy.  I  welded the window in Cricut Craft Room using the Art Philosophy rectangle.  I then cut 2 more frames from that window shape.  I cut the web, tail of the banner,  and gears from CTMH Artiste Cartridge.   The arrow banner cut is from the CTMH Artbooking cartridge.  Those creepy, crawly spiders are from Paper Doll Dress Up.

The paper is from the CTMH Later Sk8r Package.  I used the You Are My Happy Alphabet stamp set for the sPoOkY and the CTMH My Life Cricut Bundle stamps on the arrow.

This was a fun project using 4 different Cricut Cartridges.  I was inspired by the Exploring Cricut Challenge!  Make a Halloween project using at least 2 Cricut cuts; I think I have 10 different Cricut cuts in this card!

All CTMH products from KatiesCorner.


*Translucent illusion cord was the name of the cord I used.  I had this left over from my daughter's wedding.  Anyway, I have a tendency to use fishing line of various weights for much of my crafting ~ especially gift-bow making . 

Grandma's Dove


When I saw the challenge from Color My Heart, I couldn't help but think of my Grandma.  Grandma's favorite color was blue.  At Christmas she set the table with fine china and crystal, and the centerpiece would almost always have a lovely bird in it!

As I was looking through my stamps, I found the CTMH "Blessings of Peace" Stamp and knew that was going to be the theme!

A few weeks ago I was watching a YouTube tutorial on using dryer sheets on projects and decided this is the time to try it!  So, I quickly did some laundry because I needed a used laundry sheet.  Then I heated up the iron.  This about gave my poor husband a heart attack!  Anyway, I ironed the dryer sheet and ran up to the craft room.

I cut my card base from CTMH Daisy White and stamped the dove and Peace in CTMH Twilight ink using the "Blessings of Peace" stamp.  I set that aside to dry.  I then used the Crystal Blue ink to dye some CTMH Color-Ready Seam Binding Ribbon.  I set that aside to dry and cut some CTMH Crystal Blue cardstock and embossed it with a Swirls Cuttlebug folder.  I then inked that in Crystal Blue ink.

Here is the cool part!  I then cut the dryer sheet to size, sprayed it with Elmer's Spray Adhesive, and sprinkled Glitter over the wet sheet.  Then I turned it over and sprayed the under side of the sheet.  Next, I placed the dryer sheet over the stamped section of the card!

I wrapped the ribbon around the blue cardstock and glued it on the back with Liquid Glass.  I then tied a bow around the ribbon.  I glued that onto the card base.

I wanted my little dove to have a 3-dimensional eye, so I used the smallest cream-colored gem from the Mocha Gems and colored it with Twilight ink!  That seemed to be the finishing touch.

Thanks for this challenge; it really brought back some wonderful memories for me!  Ok, I'll stop reminiscing and go put away the laundry still in the dryer.

Check out all the great CTMH products at KatiesCorner!  October has some great promotions!

Sunday, October 20, 2013

Pumpkin Patch Fall Classic ~~ Horse Show for E-Specially Talented Horse Kids!


Pumpkin Patch Fall Classic 2013

This was a very exciting weekend for PATCH by Design!  Five riders competed in the Fall Classic.


 The decor for the banquet was, of course, cricut cuts and CTMH projects!  The programs were booklets with the base cut from the CTMH Artbooking cartridge.  I used the Dream Pop orange and embossed with hearts and swirls from M-Bossabilities folder.  The outside was stamped using CTMH Barn Red and Orange.  The letters are from the CTMH You Are My Happy Alphabet ~~ quickly becoming one of my favs!  The pumpkin and vines are from an old stamp from Michaels.  The little ribbons were from my 'bag-o-ribbons'; I buy ribbon when it is on sale and throw it in a bag for when I need it.  Therefore, I never know where I purchased it or the brand!

On the inside page "fall classic" again is from the 'Happy Alphabet' CTMH stamped in CTMH Topiary; the date is from CTMH "Capture the Date."  The horse is an older CTMH stamp "Horseshoes" and the delightful Dr. Seuss quote was from the CTMH bundle of stamps "You Are My Happy." The year numbers came from the "Capture the Date" CTMH.  (There are more pages to the programs with the names of participants and their classes.)   I printed the programs on the computer.

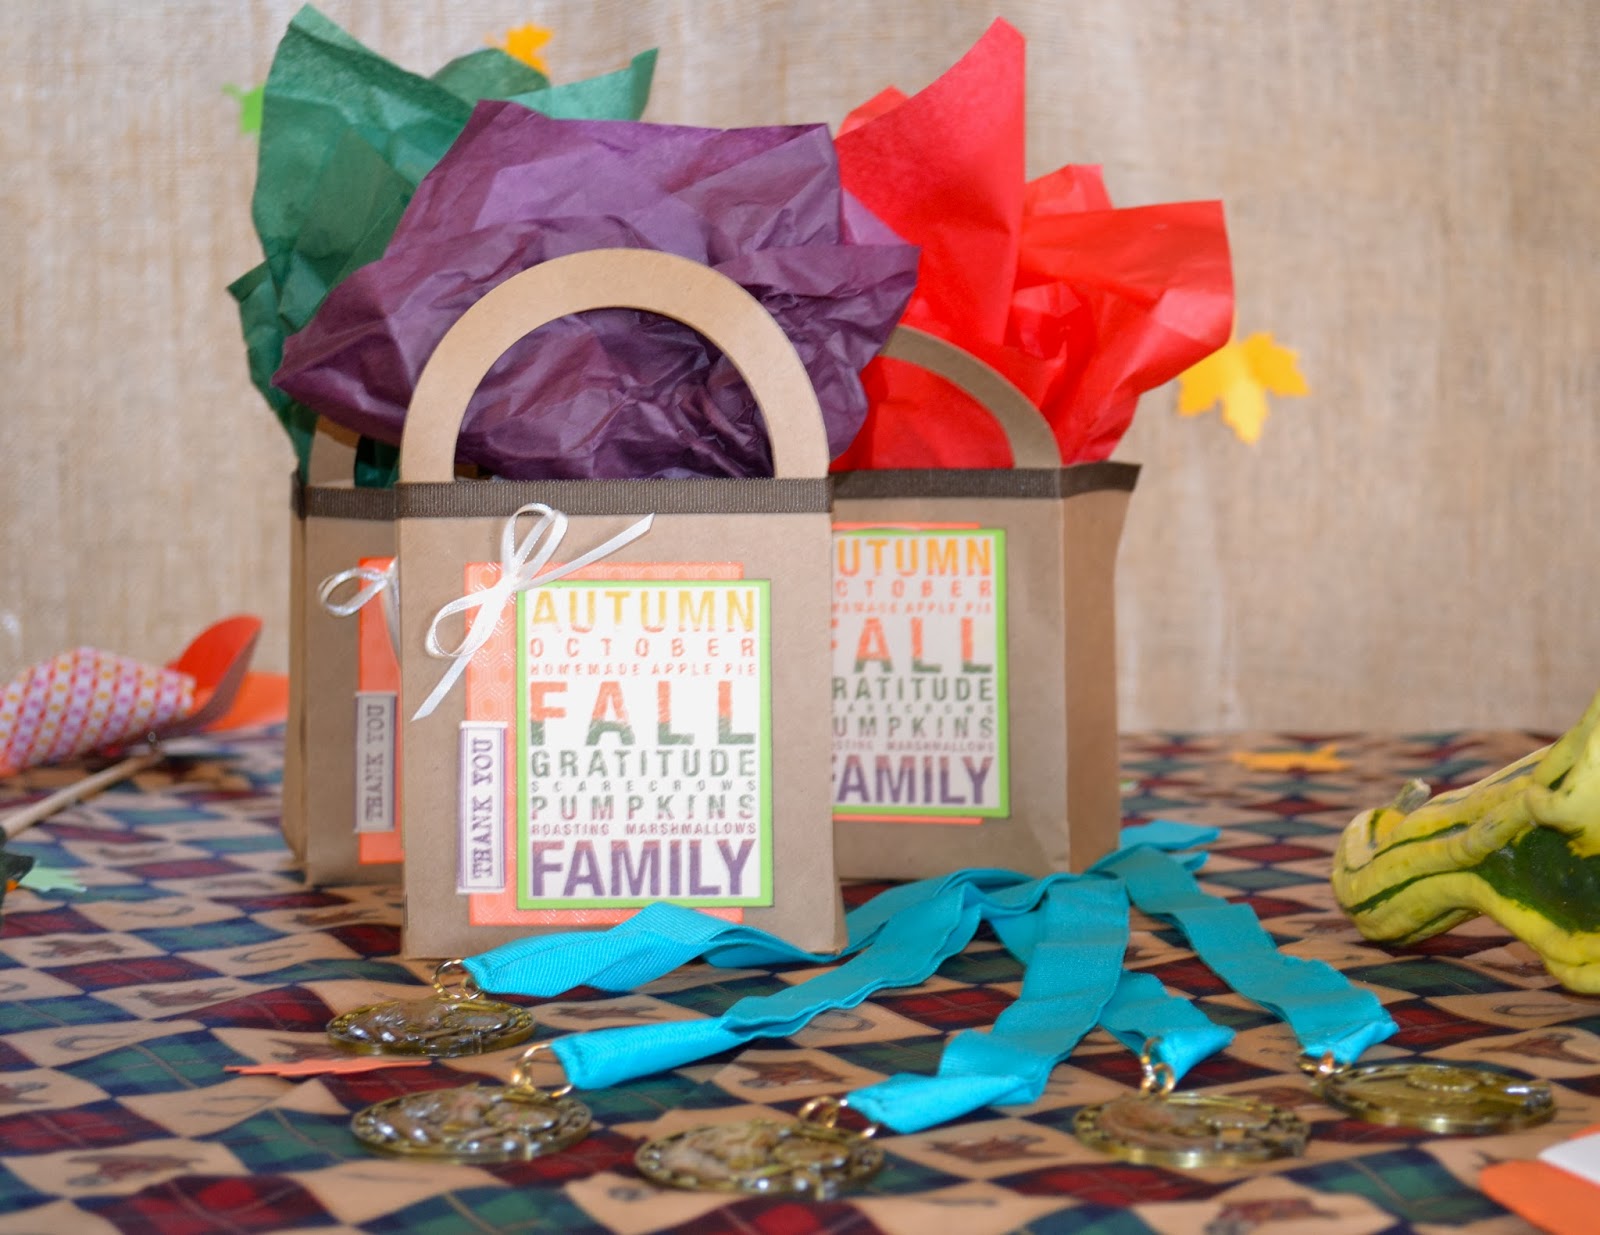
The bags were for the volunteers and you can see the post on them by going to my Sept. 23 blog page!  Also in the picture above are the awards for riding and showmanship!

To the left you see a close up of part of the backdrop from the picture above.  This pumpkin was cut from the CTMH Artbooking and the letters were welded into the pumpkin using CCR.  This font is from the CTMH Art Philosophy Cartridge.  The cardstock is also from CTMH.  The leaves were cut from CTMH cartridges Art Philosophy, Artbooking, and Artiste!  The bows were made from wired 2.5 Pumpkin Spice Craft Ribbon from Berwick.  (Yes, I ordered this for my project!  Therefore I can give you the brand!)    The backdrop base is made from burlap.  The frame is made of pvc pipe and was a leftover from my daughter's wedding!

 This riders also competed in an art contest and received the festive ribbons made from CTMH Dream Pop paper.  They are cut from the CTMH Artiste Cartridge.  The front is stamped in CTMH Twilight and Orange using Artiste Kudos stamps.  The bag pictured with these ribbons was cut from CTMH Art Philosophy.  I change the dimensions, cut off the handles and added twine; the paper is ColorBok: Wild Rose.


Here is the cake!  Yum!  What's a banquet without a fun cake to celebrate the occasion?  


PATCH celebrates the different abilities of its riders.  We currently are teaching horsemanship to  riders ranging from 2 - 14 years of age.  These kids give us their best work every week mucking stalls, grooming horses, exercising and riding horses!  We cater to participants with Autism Spectrum Disorder, Downs Syndrome, Life Challenges, etc.


Pictured above is one rider accepting his I Love Learning Ribbon from a couple of the wonderful volunteers!  To learn more about PATCH, click it!

Klavohn's Charlie Horse was voted Favorite Horse of 2013!  The little one pictured here voted for him because "he is my size!"

Thanks for sharing in our banquet via blog!

 I am sharing this with Heart 2 Heart Shape Up Challenge and Bitten by the Bug 2 Awareness Challenge.

Thursday, October 10, 2013

Happy Birthday!


Exploring Cricut
Challenge and Blog Hop
is celebrating their 3rd birthday with a Birthday Challenge!  I thought it would be fun to create a festive carnival party invitation for a little girl's 5th birthday.  Hmmm, wonder who that would be?  hee hee

The cricut cuts are:

tent ~ Paper Doll Dress Up
doll clothes ~ Paper Doll Dress Up
little girl ~ Paper Doll Dress Up
balloons ~ A Child's Year

I free cut the rectangle.

Paper:

White background is  CTMH Daisy White embossed with an M-Bossibility folder.  Little girl's body is Champagne from CTMH.   All colored paper is from Colorbok.

I used one of the stamp sets from CTMH Art Philosophy on the rectangle card.  The "Celebrate" is not curved like that, but the stamps are very flexible and easily curved to accommodate space!  I also embellished with markers and CTMH inks.  The polka dots were made by twirling a Q-tip on my stamp pad and then twirling it on her costume.

The jewels are all colored rhinestones.  I'm not sure of the brand because they are all spilled out into an embroidery floss caddy.  I don't have the packages anymore.  I adhered them with glue.

All Close to my Heart products available at Katiescorner.


Tuesday, October 8, 2013

Little Black Dress ~~ Recital Ready!


Ok, again with the music!
(Reference October 1)

The theme this week at Heart 2 Heart:  Close to my Heart Challenge Blog is Little Black Dress!  I'm sure for the majority of women this conjures up happy memories of fun times:  exciting dates, rehearsal dinners, the theater, etc.  However..........

I can't think the color black in clothing choices without thinking "gig work"!  Having been a performance major in college and a freelance/chamber musician for the past 30 years, I've come to know black dress as the work uniform.  My closet is full of black; people often ask if I work in a funeral home.  I have to chuckle at this one because I am a child of a two generation owned mortuary!  Since my grandparents lived above the business, I spent many a day there.  So many memories and stories ........but, I have digressed; back to the theme!

For me, the 'little black dress' is not a clothing choice I make for social events.  (Actually, most of my social events take place in the barn; ah, but I have digressed....yet again!  I'll try one more time to stay focused on the topic!)

I chose the music theme because for me that is the black dress!

I used CTMH Black and Daisy White cardstock.  I stamped with CTMH Universal Backgrounds and heat embossed with silver embossing powder.  The silver ribbon is from the 'bag-o-ribbons' and the red and silver cardstock were in scrap drawers; not sure of the brands of these.  I cut my red cardstock to size and used a Fiskars corner punch.

I used the M-Bossabilities folder on the white cardstock.

You can visit KatiesCorner for  great CTMH products!

Monday, October 7, 2013

Autumn at Home


This card was inspired by
the picture posted below at Stampin' Royalty for their challenge #196.  Bitten by the Bug had Fall Leaves as their theme this week so my little wreath on the door should be at home both places!

My card base is Barn Red from CTMH and the door is cut from the Dream Pop paper.  The leaves were cut from CTMH Artiste, Art Philosophy, and Artbooking.  The door hinges were cut from Spring Seasonal.

I used Brown Sparkles from the CTMH Huntington Workshop on the Go pack for the doorknob and the hinge nails/screws.  Family was stamped in Barn Red using the CTMH You Are My Happy alphabet.

I made this card for a very special family who is in the process of adopting some beautiful children from the foster system.  The kids have been with them for a year now and they are a lovely family!  I can't wait until it's all final and I can make the "kid shower" invitations!

All CTMH papers and goodies can be found at KatiesCorner!

This is the picture from Stampin' Royalty that inspired the card.  Very pretty fireplace and mantle!

Tuesday, October 1, 2013

Creating an Overlay ~~ Musician's Style!

Caution:  There are
way too many music 
references in this post!

Why do I always feel I need to re-write Bach (or re-invent the wheel)?  I loved Melanie's challenge at Bitten by the Bug 2 to use an overlay.  A little scrappy history at this point:  I have followed Melanie for some time now.  She inspired my daughter to become a consultant which in turn keeps me busy burning through the paper!  My husband says, "Thanks, Melanie," as he looks around the messy house, paper scraps everywhere!  Anyway, back to the topic......

I looked at all the creative overlay choices but felt inspired to compose my own!

I started with a rectangle bass, oops -- meant base, from Joys of the Season cartridge where I also found the single and double eighth notes.  The treble clef is from Cursive 101.  I went to CCR and positioned the notes and clefs onto the rectangle and changed some of their sizes to make it a little more random.  I welded them in and this created the overlay!  I did need to glue in the little black pieces for the treble clefs.

I cut the big clef, shadow, and base from red, black and white card stocks.  This is the same clef from the overlay; I simply made it a little fatter.  I popped it off the card with 3-D tape from CTMH.  I ornamented with ribbon.

This really was fun creating the overlay from different cartridges.  I'm looking forward to trying this with some other motifs!  I might say there could be variations upon this theme!